Project Initialization
Windows
This page introduces the process of importing libraries and initializing a project using MinGW and MSVC.
1. MinGW+Qt
- MinGW
- MSVC
First, find the host computer SDK download section in the relevant downloads and choose the latest version of the API to download.
In the Cpp folder, there is an include header folder. Under the windows folder, win_mingw64_v2.x.x contains the latest version of the dynamic library.
1.1 Create a Project
Create a Qt Widgets Application project named qt_demo.
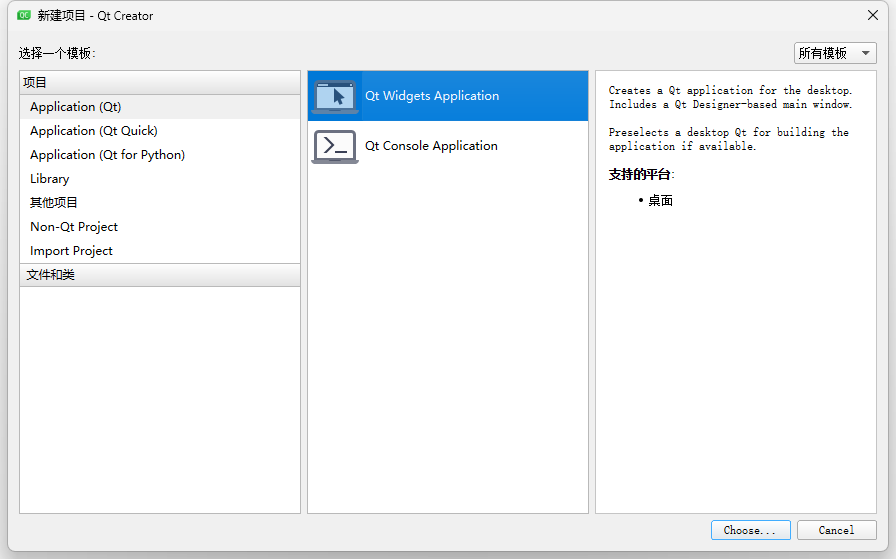
1.2 Import the SDK
After creating the project, create a libs folder under the project and copy the SDK into the project folder.
Assume your directory structure is as follows:
Project Root/
├── libs/
│   ├── include/
│   │   └── c_interface
│   │   └── cpp_interface
│   │   └── parameter
│   ├── libnrc_host.dll.a
│   └── nrc_host.dll
└── main.cpp
└── mainwindow.cpp
└── mainwindow.h
└── mainwindow.ui
└── qt_demo.pro
Add the SDK header files and library references at the end of the qt_demo.pro file.
# 1. Specify header file path
INCLUDEPATH += $$PWD/libs/include
# 2. Specify library file search path
LIBS += -L$$PWD/libs
# 3. Link the library file (note the naming format)
LIBS += -lnrc_host
# 4. Ensure .dll can be found at runtime (optional, see notes below)
win32 {
    # Copy .dll to the build output directory (e.g., debug/release)
    DLL_SOURCE = $$shell_path($${PWD}\libs\nrc_host.dll)
    DLL_TARGET = $$shell_path($${OUT_PWD}\\)
    QMAKE_POST_LINK += $$quote(cmd /c copy /Y $$quote($$DLL_SOURCE) $$quote($$DLL_TARGET))
}
1.3 Include the Header File
Add the header file #include "cpp_interface/nrc_api.h" in mainwindows.cpp.
#include "mainwindow.h"
#include "ui_mainwindow.h"
// Add the library header file
#include "cpp_interface/nrc_api.h"


MainWindow::MainWindow(QWidget *parent)
    : QMainWindow(parent)
    , ui(new Ui::MainWindow)
{
    ui->setupUi(this);
}


MainWindow::~MainWindow()
{
    delete ui;
}
1.4 Run
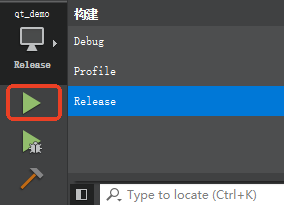
Click Run. If there are no errors, it means the header file was successfully imported.
For more examples, visit C++ API Reference | NexDroid Technology
2. MSVC
- IDE used: Qt Creator 5.0.2
- Build kit: Qt 5.12.12 MinGW 64-bit
In the Cpp folder, there is an include header folder. Under the windows folder, win_msvc2017_x64_v2.x.x contains the latest version of the dynamic library.
2.1 Create a Project
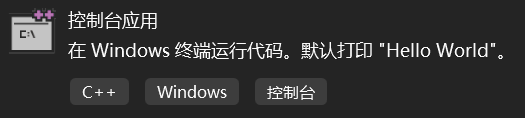
Select C++ "Console Application" to create.
2.2 Import the SDK
After creating the project, copy the SDK into the newly created project folder.
Assume your directory structure is as follows:
Project Root/
├── libs/
│   ├── include/
│   │   └── c_interface
│   │   └── cpp_interface
│   │   └── parameter
│   ├── nrc_host.lib
│   └── nrc_host.dll
└── cpp_demo.cpp
└── cpp_demo.aps
└── cpp_demo.rc
└── cpp_demo.vcxproj
└── resource.h
In Visual Studio, right-click the project → Properties → configure the following options:
(1) Add Header File Path
- IDE used: Visual Studio 2022
- Build tool: MSVC Release x64
$(ProjectDir)libs\include(2) Add Library Path
- Configuration Properties → C/C++ → General → Additional Include Directories Add the header file path:
$(ProjectDir)libs(3) Link the Library File
- Configuration Properties → Linker → General → Additional Library Directories Add the path where the
.libfile is located:
nrc_host.lib(4) Ensure .dll Can Be Found at Runtime
- Configuration Properties → Linker → Input → Additional Dependencies Add the
.libfile name:
copy "$(ProjectDir)libs\nrc_host.dll" "$(OutDir)"2.3 Include the Header File
Add the header file in cpp_demo.cpp.
#include <iostream>
#include <thread>
#include <chrono>
#include <string>
#include "cpp_interface/nrc_interface.h"  // Import header file


int main()
{
    SOCKETFD fd = connect_robot("192.168.1.15", "6001");
    if (fd <= 0)
    {
        std::cout << "Connection failed" << std::endl;
        return 0;
    }
    std::cout << "Connection succeeded: " << fd << std::endl;
}
Click Local Windows Debugger. If using the Debug version of the library, switch Release to Debug.

If there are no errors, it means the SDK has been successfully imported.
For more examples, visit C++ API Reference | NexDroid Technology
Linux
Create three new folders: include, lib, and src. Place the api/ folder into include. Place libnrc_host into lib. Create a new main.cpp file under the src folder.

1. Create a Makefile
Copy the following content into the Makefile and save it.
TARGET=demo
all:
  g++ -o $(TARGET) src/*.cpp -I./include -L./lib -lnrc_host -lpthread -lm -ldl -lrt -lstdc++ -std=c++11 -fPIC
clean:
  rm $(TARGET) $(objects)
2. Create a main.cpp File Under src
#include <iostream>
#include "cpp_interface/nrc_api.h"


int main() {
  std::cout << "connect state: " << std::endl;
  SOCKETFD fd = connect_robot("192.168.1.15","6001");
  std::cout << "connect state: " << get_connection_status(fd) << std::endl;
}
3. Compile to Generate the Executable
Open the terminal and use make to compile the executable program demo.
For more examples, visit API Examples | NexDroid Technology
- Configuration Properties → Build Events → Post-Build Event Add the
.libfile name: