Teach pendant development communication tutorial
Introduction
The development of a control system can be summarized as the interaction between the teach pendant and the controller. The teach pendant provides a graphical interface through which users can perform operations to send instructions. The controller, in turn, is responsible for processing these instructions, interacting with the robot servo, and providing feedback on interactions and processing results to the teach pendant, which are then displayed through the graphical interface. Therefore, the actual development work involves creating the graphical interactive interface for the teach pendant and implementing the logic functions for the controller.
· Teach pendant sends message to controller
Ⅰ. Write a signal-triggered button
Since interaction is required, the teach pendant must have a method of triggering the signal so that it knows when to send the signal to the controller. The most typical method is to create a button. When the user clicks the button, it will send a signal to the controller. Of course, there are many other ways to trigger the signal, for example, when a certain interface is opened, when a certain communication is received, when the timer reaches a certain value. Here we choose the simplest and most typical button as an example.
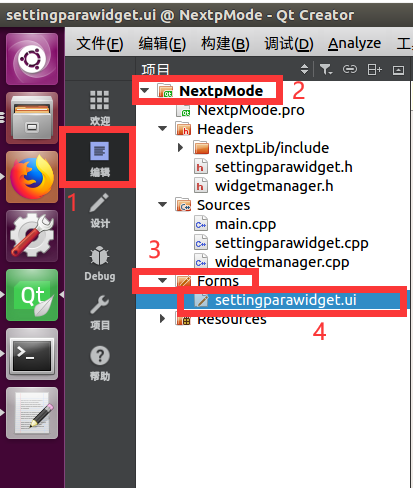
Firstly, download the pre-configured environment and teach pendant development demo file from the official website. Use QT to open the demo routine


After opening the demo routine, we enter the QT design interface

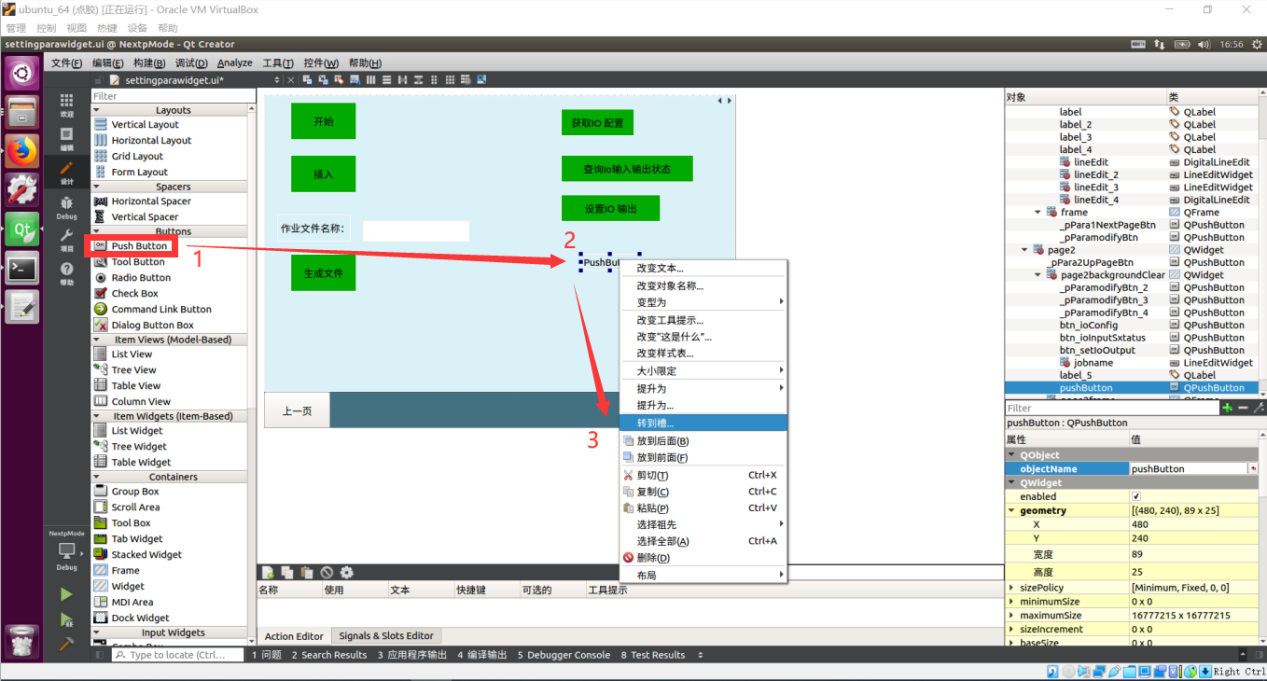
Add a Push Button (button) control to the demo routine, and use the "Go to slot" to write a function that is triggered when the button is clicked


clicked() means that clicking on the button will trigger a signal, write the following code in the trigger function as shown below:
Nextp::getInstance()->sendMessage(Nextp::SetFirstUserParaCommand,QByteArray().append(QString::fromStdString("hello")));

This is a slot function triggered by a button. Whenever the user clicks the button, the content within it will be executed. The actual meaning of this code is to send the string "hello" to the controller using protocol number 0x9200, where Nextp::SetFirstUserParaCommand represents the protocol number 0x9200. You can refer to the following image for the specific protocol numbers:

The protocol numbers here are all open protocol numbers for development, and the receiving function of the controller part has been built in, so you only need to send a message through the corresponding protocol number, and the controller can receive the signal. In this example, the message is a hello string. This message can be replaced with any parameter stored in QString format. Json format is often used in actual development
Compile with Desktop Qt 5.9.0 GCC 64bit package release

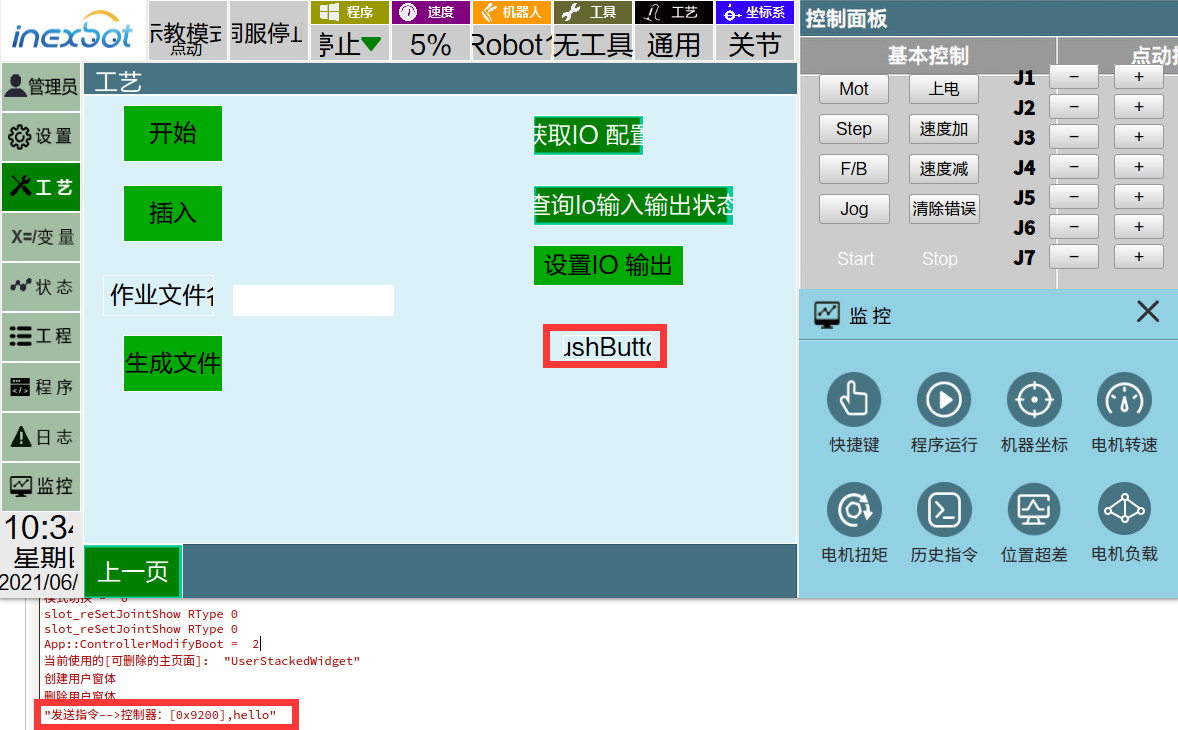
After successfully compiling, start the program and enter the administrator account with password 123456, then proceed to the user interface

Find the button we just added, click on it, you will see in the compiled output area that the teach pendant sent "hello" to the controller at 0x9200

At this point, our teach pendant communication transmission has been completed. By pressing the button, a "hello" message will be sent to the controller at 0x9200. However, the controller does not know the meaning of "hello", so we need to proceed with the development of the controller. This step is to make the controller understand what actions to take upon receiving the "hello" message. These actions could include sending motion instructions to the robot, outputting IO signals, or sending a response back to the teach pendant. The specific functionalities to be implemented depend on the customer's requirements. For instructions on controller-side development in communication, please refer to the tutorial "Controller Development Communication Tutorial".